
Ironing on patches can make your clothes unique. It’s a fun way to add style to jackets and backpacks.
This DIY trend lets you show off your personality. You can create endless designs with patches.
Patch application needs the proper technique. You can use vintage logos or custom-embroidered designs.
This guide will teach you how to iron patches. You’ll learn to create long-lasting, professional results.
Knowing the basics helps avoid mistakes. We’ll cover everything from picking patches to perfect applications.
Get ready to transform your clothes. You’ll soon be creating amazing designs.
With simple tools and methods, you can make incredible custom pieces. Let’s start ironing patches!
Introduction to Ironing On Patches
Patches have changed how people customize and fix clothes. They offer a quick way to add style or repair garments.
Iron-on patches transform ordinary items into unique fashion pieces. They can be used on jackets, backpacks, and workwear.
Patch lovers enjoy this simple DIY method. It needs less skill than sewing and only requires an iron.
With the right technique, anyone can quickly personalize their clothing. The process is easy for crafters of all skill levels.
Iron-on patches help cover flaws and show off your style. They can fix worn jeans or add flair to plain jackets.
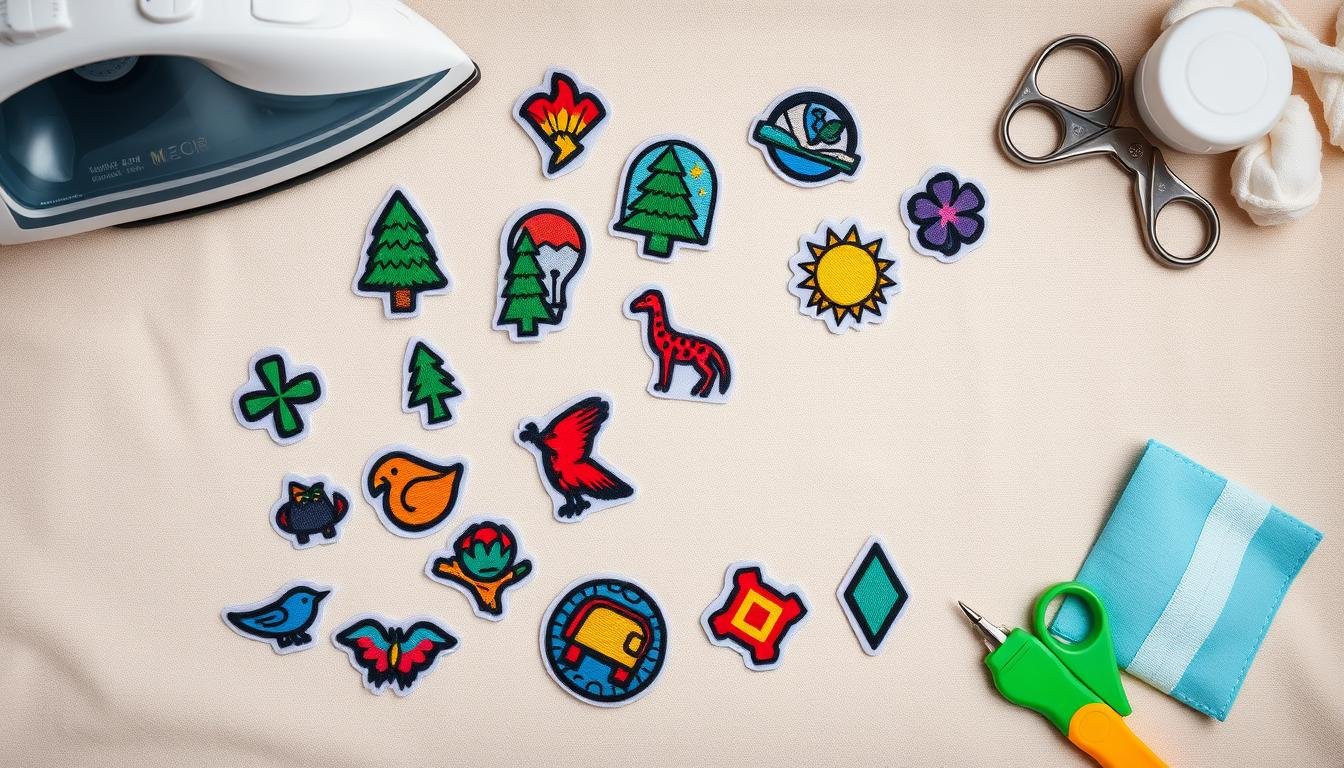
Choosing the Right Patch for Your Project
The right patch can make your garment or accessory stand out. Different iron-on patch types offer unique features for your creative project.
Embroidered patches give a classic, textured look with raised threads. They work best on sturdy materials like denim and leather jackets.
Screen-printed patches are smoother and more vibrant. They’re great for complex graphics and photographs with bright colours.
Screen-printed patches work well on lighter fabrics like T-shirts. When choosing, consider the fabric weight, design complexity, and intended use.
Your patch should look great and stick well to the surface—high-quality embroidered patches often last longer than screen-printed ones.
Think about what your project needs most. Pick the patch that looks good and works well.
Preparing Your Garment for Patching
Fabric prep is key for patch success. Clean the garment well to help the patch stick.
Choose a spot with a little stretch for the patch. Smooth, flat areas work best for iron-on patches.
Avoid seams and heavy creases. Pick a stable spot for your patch.
Wash the item without fabric softener. Dry it thoroughly before applying the patch.
Use a clean, dry surface for patching. This keeps dirt from messing up the bond.
Pro tip: Iron the patch area first. This makes the surface smooth and flat.
A smooth surface helps the patch stick better. Your patch will look more pro, too.
Tools You’ll Need for Ironing Patches
Ironing patches requires the right tools. Depending on your project, a steam or dry iron is key.
A heat-proof cloth protects your garment and work area. For best results, use a thick cotton cloth or Teflon sheet.
A flat, sturdy ironing board is essential. Choose one with a smooth surface for even patch sticking.
Get an iron with adjustable heat settings. This helps you work with different fabrics safely.
Tweezers or fabric scissors help place patches correctly. A ruler can ensure perfect patch placement.
Test your iron on scrap fabric first. This helps avoid damage and gives a pro-looking result.
Step-by-Step Guide to Ironing on Patches
Ironing on patches takes care and skill. Start with a flat, heat-safe surface like an ironing board.
Make sure your fabric is clean and smooth. Set your iron to the highest safe heat for the fabric.
Most cotton and denim work well with high heat. Put a thin cloth between the iron and the patch.
Place the patch where you want it on the garment. Press the iron firmly on the patch for 30-45 seconds.
Let the patch cool before touching it. Check the edges to make sure they’re stuck well.
For extra strength, turn the garment inside out. Iron the patch again from the backside.
If the patch doesn’t stick well, try ironing it again. Some patches need more heat to stay on.
Securing the Patch for Longevity
Protecting iron-on patches requires innovative reinforcement strategies. Pro crafters know extra care extends the life of customized garments.
Sewing patches around the edges adds security. This goes beyond the initial iron-on application.
Use a simple stitch to prevent patch edges from peeling. A straight or zigzag stitch works well.
Stay close to the edge without overlapping the design. This keeps the patch looking sound and securely attached.
Delicate fabrics need gentle care. Choose lightweight thread matching your patch or garment colour.
For thick materials, use robust thread. It should withstand washing and wear.
Hand-stitching offers control for intricate patches. Machine stitching works for more extensive, simpler designs.
Proper washing is key for patch longevity. Turn garments inside out before cleaning.
Use gentle cycle settings. Avoid high-heat drying to protect patches and fabric.
These methods keep your custom creations vibrant and secure. Your patches will look great for years to come.
Troubleshooting Common Issues
Iron-on patches can be tricky for crafters. Let’s look at some common problems and how to fix them.
Uneven sticking is a frequent issue. This happens when the iron’s heat or pressure isn’t proper.
Use medium-high heat and press firmly across the whole patch. A thin cloth between the iron and the patch can help spread heat better.
Choose patches with precise edges that match your fabric. Test on a small area first to avoid damaging the fabric.
Patches that peel off need more heat or better ironing. Press for at least 30-45 seconds, covering every edge.
For delicate fabrics, use lower heat and press longer. Some patches need fabric glue to stick well.
Try applying heat multiple times or using both heat and glue. Patience and care will yield great results.
Creative Ideas for Decorating with Patches
Patches can make plain clothes look amazing. They’re not just for fixing holes; they can also show off your style.
Find patches that match who you are. Old jean jackets are great for adding lots of patches.
Mix different kinds of patches to make things more fun. Try leather patches on jeans or fun pictures on backpacks.
Patches can fix clothes and make them look cool. Put patches in neat ways to cover holes.
Try putting patches on jacket sleeves or across the knees. Patches can also make bags look cool.
Collect patches that show what you like. Music fans might like band patches.
People who love to travel could make a map with patches, or you can turn simple clothes into art with patches.
Always use good iron-on patches. Follow the rules to make sure they stay on well.
Caring for Ironed-on Patches
Proper patch care keeps your custom clothes looking great. To protect patches from damage, turn garments inside out before washing.
Use a gentle cycle with cold water for washing. Choose mild detergents without bleach or harsh chemicals.
Skip fabric softeners. They can stop patches from sticking well.
Air drying is best for patched clothes. If using a dryer, pick the lowest heat setting.
You can also hang or lay flat to dry. This helps keep both fabric and patches looking good.
Check patch edges often for lifting or wear. A quick press with a cool iron can help patches stick better.
FAQs About Ironing On Patches
Patch fans often ask about using and removing patches. Learning about iron-on patches helps you easily create cool designs.
Many wonder how to take off patches. Use an iron or hair dryer to soften the glue.
Slowly peel the patch off to avoid damage. Clean any leftover glue with special removers.
Some patches can be used again if they’re still sticky. Delicate patches might not stick well after removal.
Always test a small area first when removing patches. Use medium heat and cover nearby fabric.
Before removal, check if the patch works with your garment. Patch life depends on fabric, patch quality, and how it’s put on.
Cotton and denim hold patches well. Slippery or stretchy fabrics need extra care.
If you’re not sure, check the patch instructions. Ask craft experts for help with tricky patches.
Conclusion: Enjoying Your Custom Creations
Ironing on patches lets you create unique, personalized clothing. You can transform plain garments into unique fashion statements.
Each patch tells a story and adds character to your wardrobe. Custom-patched items are personal canvases that show your style.
Practice will help you master patch placement on different fabrics. You’ll gain confidence in creating one-of-a-kind pieces.
Your creativity has no limits with patch design. Show off your interests and memories through your clothing.
Update a denim jacket or add flair to a backpack. Iron-on patches are a fun way to express yourself.
Turn ordinary items into extraordinary personal statements. Your new skills will inspire many creative projects.
Develop a unique style that stands out from the crowd. Enjoy the journey of DIY fashion with iron-on patches.
FAQ
How long do iron-on patches typically last?
Iron-on patches can last through 25-50 wash cycles. Their lifespan depends on patch quality, fabric type, and proper care.
Can I iron on patches to any fabric?
Iron-on patches work best on cotton, polyester, and cotton-blend fabrics. Delicate materials may need special techniques or professional application.
Always test on a small area first. Check patch instructions before applying.
What temperature should I use when ironing on patches?
Most patches need medium to high heat (350-400°F). Follow the specific instructions for your patch.
Use a protective cloth between the iron and the patch. This prevents direct heat damage.
How can I remove an iron-on patch if I don’t want it anymore?
Removing iron-on patches can be tricky. Use a seam ripper or heat-activated adhesive remover.
You can also ask a professional tailor for help. Be aware that removal may damage the fabric.
Can I wash and dry clothes with iron-on patches normally?
After 24-48 hours, most patches can be machine washed and dried. Use a gentle cycle with cold water.
Avoid high heat when drying. Turn the garment inside out to protect the patch.
Do I need to sew the edges of an iron-on patch?
Sewing edges provides extra security and prevents peeling over time. It’s recommended for frequently worn or washed items.
This is also helpful for patches on stretchy fabrics.
Can I reuse an iron-on patch after removing it?
Iron-on patches usually can’t be reused after removal. The adhesive is designed for one-time use.
If you want to reapply a patch, it’s best to use a new one.
What’s the best surface to iron on patches?
Use a flat, hard surface like an ironing board. Avoid soft surfaces like beds or couches.
Place a thin cloth between the iron and the patch. This protects both the patch and fabric.
you may also read: How to Become a Successful Nail Tech in 2024